
I am a pretty mechanical guy, but I love mechanical simplicity. I recently had an issue with the rear brake on my Trek Stache 7. Getting the mechanical part fixed, the hose, was no issue. However, when I went to bleed them I got super frustrated. I am sure with enough time, and enough patience, I could have worked it out. But I was short on both, mostly the latter.
I got my friends at the local Trek shop to help me out and get them sorted so I could get back out and ride. But it left a bad taste in my mouth. What if I got out remote somewhere and had a problem that required me to bleed the brakes? Really, without a few special tools it would be near impossible.
So, I began looking into the mechanical brake scene, which is somewhat light these days. There are the old Avid BB7 standby’s and I still have a set of them on my 2011 Trek Rig. In fact, I replaced the quite horrible Avid hydraulic brakes that came on it and at one point locked up completely. The BB7’s have served faithfully ever since. But I really wanted something …. More.
Paul Component Engineering (Paul’s) makes a really nice looking and seemingly strong set of mechanical brakes called Klamper. I reached out via email to ask a few questions and was very pleased when I got a quick response form Gary Janssen, their Sales Manager. My biggest concern was more about me than their brake. At 6’6” and an average of about 245lbs, I needed more than a run of the mill mechanical brake. Luckily, I do not do any downhill and most of my current riding is either urban, gravel or light trail. But still, I need something that could bring my big butt to a stop.
Gary was great and we emailed back and forth a few times while I worked through my list of questions. Paul’s Klamper ain’t cheap. So, if I was going to invest a lot in a brake I wanted something that would do the job, last a lifetime and be easy to setup and service. He assured me that the Klamper would fit the bill!
So I pulled the trigger and ordered up a set along with their Canti Lever brake levers to match.
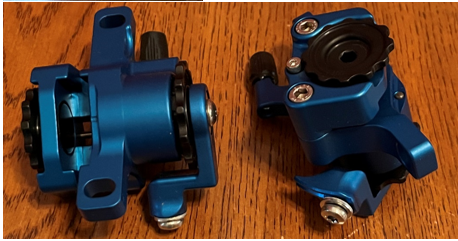
Shortly after their very attractive boxes came in the mail. I love things like their attention to detail that even went into the boxes they came in. When I opened the box and started looking at the billet brakes I quickly move from appreciation to amazement. These things are very well made, indeed. The attention to detail in the design, fit and function are second to none. My OCD kicked in and I got that tingly feeling when something is just ticks all the boxes. Well made, simple, good looking …. And billet! OMG!
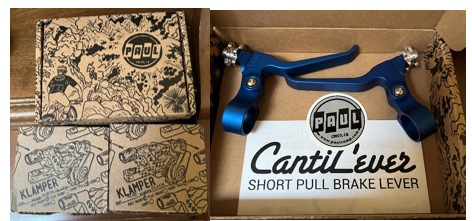
Ok, so yea, I was gushing a little over the nice blue housing and Canti levers, but they had to work and they had to be simple to install and set up. So on to the install.
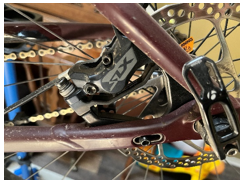
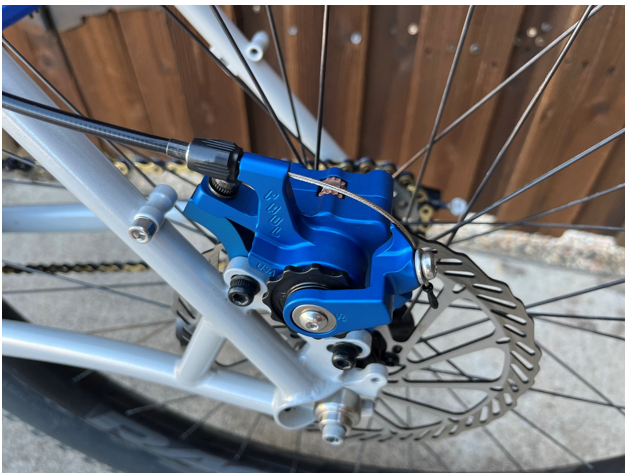
Bam! I immediately ran into a problem. They would not fit in the rear of the Stache. However, that is more a Stache issue as it’s frame is very unique. The problem is that the Klamper is a bigger unit. I mean, they need to be to provide the stopping power they are advertised to provide. But the Stache stuffs the rear brake housing in between the chain stay tube and upper leg. There is not much room there and the brake mounts on a special Trek mount. The Klamper just was not going to work there.
However, as part of this build I was considering moving back to a Surly Krampus frame I had hanging about because it really fits me so well. So I test fit the Klampers on the Krampus and they fit perfectly! I quickly began swapping components over to the Krampus frame.
Setup of the Klampers is super easy. I had questioned Gary about special cables, but he said no. Just put standard good quality mechanical brake cables on and go. My local bike shop had a full Bontrager Elite mechanical brake line kit. The Elite kit offers a set of polished stainless brake cables and nice housings along with ferrule and cable end crimps. I took my time and had to hold off for a day while I ordered in a proper brake housing/cable cutter. But once everything was in I had them set up in no time. Paul’s instructions are one page and just that simple.
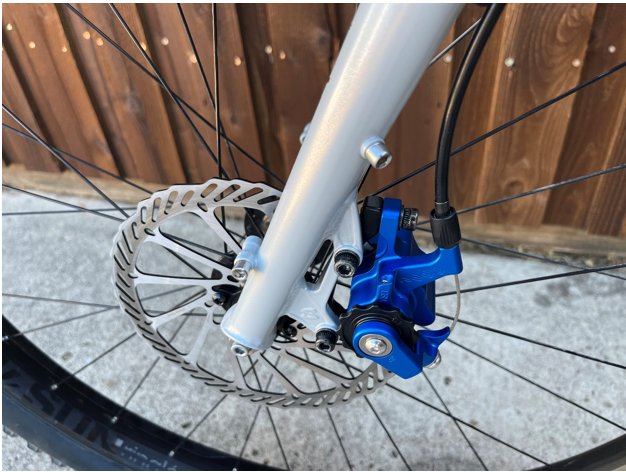
The key, I have found, is that you need to ride these things for a bit. I put on new rotors as well to make sure everything had a 100% chance to work without something old getting in the way. Once I bedded the pads properly I started just riding. Only “tuning” the Klampers every couple of rides. Tuning only involved dialing in the adjusters dials a click or two on each side. That’s it. They are that easy!
Now, how did they feel?
Like I said, I am a big guy. However, I found it really easy to get either tire to fully lock up. Once you get the rotors and pads bedded and do a little adjustment, they will lock the back tire up without issue. But, we really do not want them locking up, right! So here is where a lot of people will find fault with a mechanical brake. Modulation is where hydraulic brakes really shine. But, to be totally honest, I find that the modulation on the Klampers works just fine, and I do a lot of trail braking. This comes from my motorcycling background. I feather the front brake and then to trail brake in the rear. This provides me with ample modulation with these brakes. Like I said, if I really have to hammer down on them they will lock the back tire up readily enough, and clean put me over the front of the bike with too much front brake.
So, simple, good looking, easy to install, easy to set up, easy to adjust and ample braking for a big guy on a big (XL) bike. OCD kicking in again with all boxes checked. To me the Klampers are a big win on this bike and for this build. I would honestly put them on anything I planned to ride.
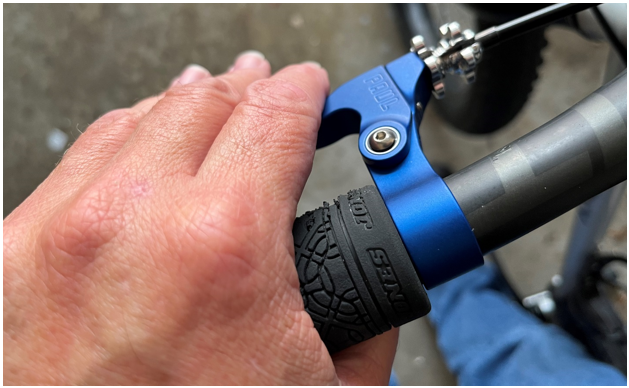
A mention of the Canti Levers. I have big hands and long fingers. I have not needed to adjust the Canti’s at all. But be aware, at their further-most setting they are a reach. Perfect for my monkey paws and adjustable if your hand is smaller. Just take this into consideration and talk to Paul’s about it when you buy. With my long fingers my fingertips just droop over the lever and I can rest them comfortably there. It takes only a very small amount of rotation of my hand to get a full grip on the lever.
Yes, the Klampers are expensive. But I have spent many years buying all kinds of expensive parts for cars, motorcycles and bicycles. Many end up on my shelf or sold off. That will not be the case with these Klampers. They are on to stay! I think the investment is well spent if what you are looking for is what I was looking for: Simplicity, Simplicity, Simplicity